
Smart homes are becoming the future of residential living, and installing smart switches is a key step towards enhancing both convenience and energy efficiency in your living space. These smart devices allow you to control your lighting remotely and automate your home environment, providing numerous benefits from reducing electricity consumption to enhancing home security. In this step-by-step guide to installing smart switches, you'll learn how you can integrate these advanced tools into your lifestyle seamlessly.
Why Install Smart Switches?
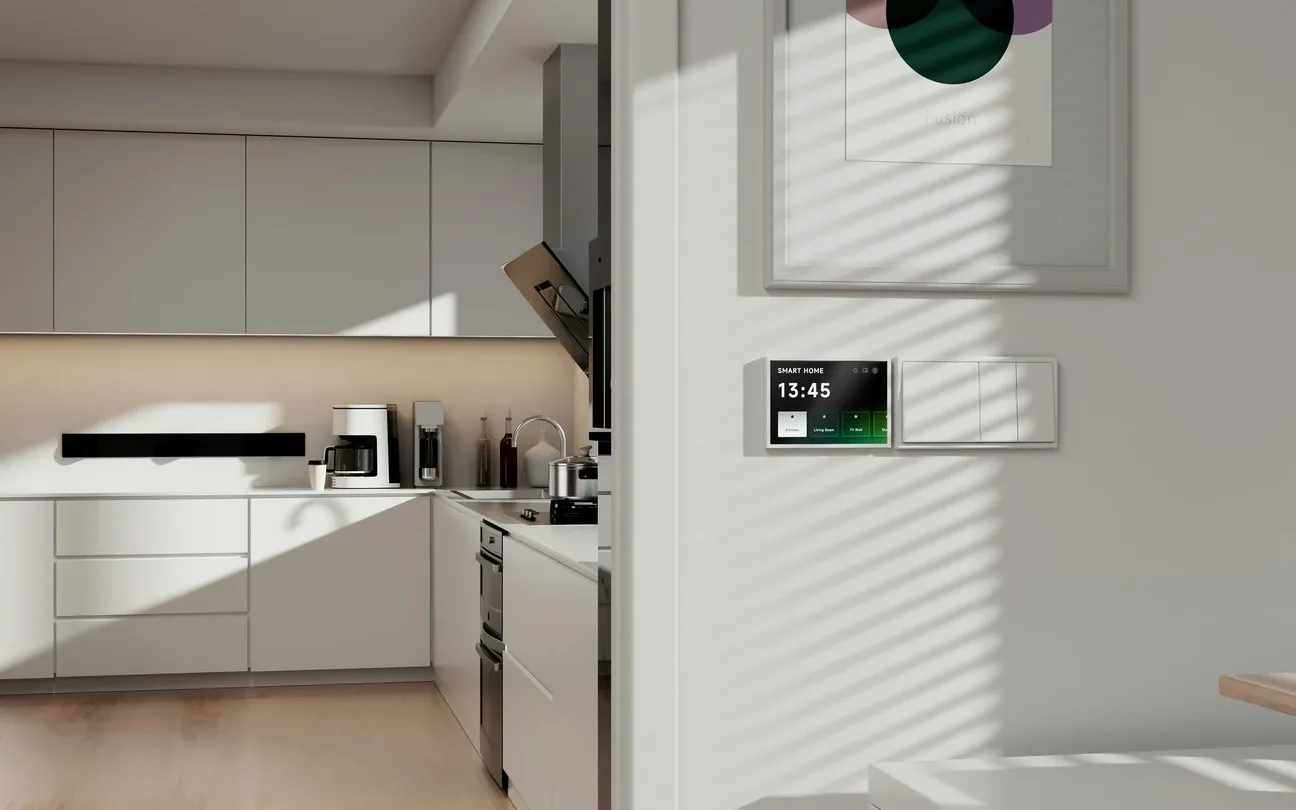
Integrating smart switches into your home automation setup offers multiple advantages. They are an essential component of a modern smart lighting system. By replacing traditional switches with smart ones, you can:
- Control lights remotely via apps or voice assistants like Amazon Alexa or Google Assistant.
- Schedule lights to turn on/off at specific times, enhancing security and reducing unnecessary energy usage.
- Integrate with other smart home devices for a more interconnected environment.
- Experience the convenience of adjusting lighting without moving from your place.
What You Need for Installation
Before jumping into installation, it's crucial to gather everything you need:
- A compatible smart switch that works with your existing setup.
- A stable Wi-Fi connection.
- Basic tools like a screwdriver and voltage tester.
- Access to a streaming device of your choice to access the switch’s app interface.
- Familiarity with your home's wiring or readiness to consult a professional.
Preparing for Installation
Before you begin, ensure you have taken safety precautions, such as turning off the power to the light switch at the circuit breaker. This is important to avoid any electrical hazards.
Steps to Install a Smart Switch
Remove the old switch: Carefully unscrew and disconnect it from the electrical box. Make sure wires are properly labeled or marked.
Connect the new smart switch: Follow the manufacturer's instructions for connecting the wires. Generally, this involves connecting the line, load, neutral, and ground wires.
Attach the smart switch to the wall: Secure it as you would a standard switch, ensuring it's level and aligned with the wall plate.
Restore power and configure settings: Turn the circuit breaker back on and follow the app setup instructions provided by your smart switch manufacturer to configure the device on your home network.
Integrating Smart Switches with Other Devices
Most smart switches seamlessly integrate with smart home hubs like SmartThings or Apple HomeKit. This allows you to create routines or set the conditions for when your lights should turn on or off.
Tips for Optimizing Smart Switch Use
- Use voice control to adjust lighting without disrupting your activities.
- Set up automations to help manage energy usage better.
- Regularly update the firmware of your smart devices to ensure security and enhanced features.
- Experiment with different light temperatures and brightness settings to create the perfect ambiance.
By following this guide, you’ll not only improve your home's energy efficiency but also transform your everyday experience into something smarter and more convenient. Installing smart switches may seem daunting initially, but with preparation and this clear guide, you'll find that it's a manageable task that offers significant rewards. Enjoy a connected, automated living space with smart solutions tailored just for your unique lifestyle.